Showing posts with label ZBrush. Show all posts

Thursday, December 17, 2015

Female 3D Model - Dress Detail Rework


So a couple days ago I thought I was done with the dress for my model, but after showing it to my professor he gave me some feedback on the folds. I decided to go back and do more work on it and I think this looks a lot better.

I went back and tried to add a few more folds, but I wanted to keep it light. I didn't have to worry about doing the retopology again since I didn't change the overall shape of the dress. I don't know if I will get to baking out the normal maps before I turn the assignment in, but since I will continue to work on this project I don't think of this as wasted work. That's all for now, thanks for reading!

Thursday, August 20, 2015

Low Poly Sword - Poly Painted


So I just finished painting the sword in ZBrush and now just need to bake all the maps so I can render the low poly model with the color and normal map of this version from ZBrush.

I was hoping that I was going to be able to finish this morning, but it will still take a few more hours to finish and apply a toon shader for the sword to make it look the way I want. That's all for now, thanks for reading!

Wednesday, August 19, 2015

Low Poly Sword - Detailed


So yesterday I finished the low poly model of the sword, so today I decided to finish the high poly model. There really isn't all that much detail on it, but its enough that I will be able to get a good normal map.


I think that the one part that has the most detail, and I don't know if I wasted all my time is in the hilt. I made some grooves on the handle for the grip since this is a one handed sword. I added some dent and scratches throughout the sword and now I have to paint the model. That's all for now, thanks for reading!

Wednesday, August 5, 2015

Texture Tuesday - August 4


So I have been working a lot of over time over the last few months and recently stopped. Since I have more time to work on my art, I decided that it was time to start up Texture Tuesday again. 

Since I am currently in the process of creating a 3D environment, I decided to make the texture that I will use for the walls. I started the blocks in Maya, took it to ZBrush for the detail, and finally baked the normal/ao map in XNormal.

I will add color to the texture in the next few days and post an update. That's all for now, thanks for reading!

Tuesday, March 10, 2015

Grey Fox Helmet - ZBrush Sculpt

So for this week we had to make a hard surface model of some kind in ZBrush, so I decided to make some fan art of Grey Fox's helmet.

In my model I tried to make it look like he had been in a fight and part of it was damaged. I will have to go back and add more damage since at the moment its a little too smooth for it to be real. Anyways, here is what I have so far:


Anyways, that's all for now and thanks for reading!

Tuesday, February 24, 2015

Obama ZBrush Caricature

Front

Side

This week we had to submit a caricature of a famous person for our homework, I decided to do a ZBrush model of President Obama.

I did this bust using Dynamesh and then did a quick polypaint coat. That's all for now, thanks for reading!

Tuesday, February 10, 2015

Mixed Animal Bust # 2

So I was looking at my previous version of this and sculpt and I didn't like how much stuff I had going on.

I decided to get rid of the mane and decided to give it a look more along a dog and a goat. Here is what I have:


Tuesday, February 3, 2015

Alligator Speed Sculpt


So tonight in my ZBrush class we had a speed sculpt assignment to try and sculpt the alligator from the Peter Pan carton:


The point of the exercise wasn't to get a perfect replica or to get in all the detail. It was more to try and set the main big masses and try to shape it to look like the alligator. I think I did a good job in the short time I had.

At first I kind of panicked because I didn't really know where to start. I decided to start with the eyes and then everything kid of just flowed out of there. I  think I did a good job at getting the shape of the head. I plan on coming back to this and getting more work done on it.

That's all for now, thanks for reading!

Tuesday, January 27, 2015

Mixed Animal Bust # 1

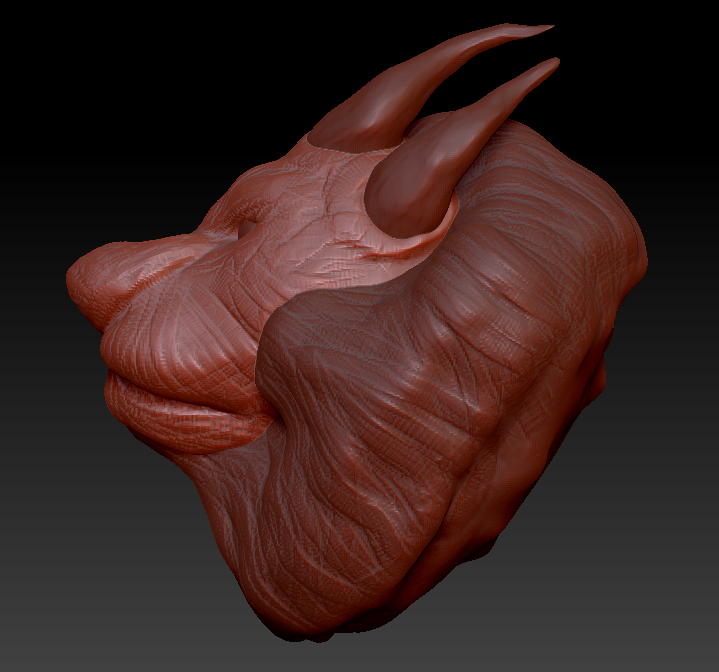
Today we had a speed sculpt session at the end of my ZBrush class. The point of this exercise was to make a mixed animal, so I decided to make a lion with horns.

Here is what I have:


I'm going to continue working on this, thanks for reading!

Tuesday, January 20, 2015

Texture Tuesday - January 20


Here is what I did for today's texture. Since I'm back in school, I didn't have much time to start it earlier, so this was literally like an hour worth of work to make the high poly version of these wood planks for my texture.

I did the base model cubes in Maya since I find it easier to move stuff around in Maya. I also tried to subdivide the model a bit before sending it into ZBrush. This way I could make sure that my quads will be a little more uniform once I start upping the resolution. I did all the sculpting in ZBrush fairly quickly while I was on a class tonight.

I will bake the Normal and AO maps when I get a minute. Then I will try to do a quick Diffuse map in Photoshop. That's all for now, thanks for reading!

Thursday, January 8, 2015

Texture Revision for January 6


So I got some feedback that the slabs were too smooth on my Facebook group for the textured I did yesterday. So I went back to Zbrush and added played around more with it.

I have included my revised texture and I also decided to do a render in Marmoset Toolbag 2.

Thanks for reading!

Wednesday, January 7, 2015

Texture Tuesday - January 6


So one of my old professors just started a Facebook group called Texture Tuesday. The idea is to make a quick texture about anything for games.

This is the texture that I made today. I started with the base model in Maya and then took it to Zbrush for the detail. I baked out a Nrmal Map and AO. This was actually a lot of fun to make, and hopefully I'll have time to do one every Tuesday.

That's all for now, thanks for reading!

Tuesday, November 4, 2014

Death's Mask - Pedestal Idea


So after starting this little project to make a replica of Death's Mask from Darksiders 2 I thought to myself that I needed something more than just the mask to make this piece really pop. My idea was to make some kind of pedestal, but I needed something that would make sense to the game and that would look cool. So that's when I came up with the idea above.

I'm going to give some back story to the game for those of you that don't know anything about Darksiders 2. I'm going to be as general as possible to not give away too much of the story for those of you who may care about spoilers.

The game is played from the perspective of one of the four horsemen of the Apocalypse, in this case you play as Death. On the fist game you play as War, but he was tricked into starting the Apocalypse and at the end of the game he is told that he will be punished even if it wasn't his fault.

Darksiders 2 if the story of Death trying to bring back all of humanity so his brother War is sparred. But in order to do so, he has to travel to different worlds in search of a way to revive all the people of the world. But there is a new threat that is slowly destroying all these worlds, its Corruption. This Corruption is everywhere you go, and it manifests itself looking like huge yellow crystals surrounded by black tar.

My idea for the "pedestal" of the mask is to make one of those spikes of Corruption and have Death's mask resting on it. And so far the render above is what I have. This is the first time I've tried doing rock/crystal in ZBrush, and its turning out to be a little harder than I thought it would. I will have to look at some tutorials and make sure that spike looks like crystal.

Anyways, that's all for now. If you haven't played the Darksiders series, I completely recommend it. Thanks for reading!

Thursday, October 30, 2014

Death's Mask - Retopology Done


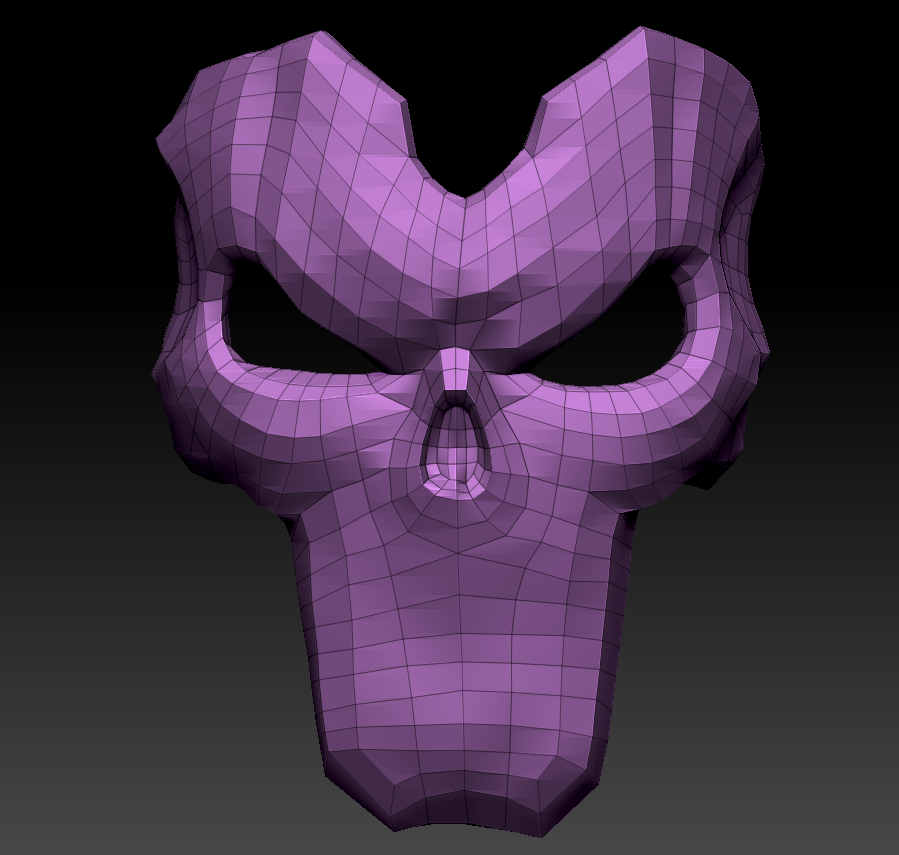
So the retopology is done, it took me a while trying to make sure that both sides would match and quads. I also had to restart the process once or twice since I messed up. I have to say that this was a really helpful experience since I've never had to do the retopo by hand on a model.

Now that I have the low poly model, I'm going to do the UVs and bake the maps. That's all for now, thanks for reading!

Thursday, October 16, 2014

Death's Mask - Retopology


Now that I have finished the high detail model, I'm working on doing the retopology.

This is my first time working with the retopology tools in ZBrush, normally I would just use ZRemesher and call it good. The problem with using ZRemesher won't really give you the best possible topology and you have almost no control of the edge flow. This is a really slow process, but it will be good practice.

Next time I think I will try to use 3D Coat or TopoGun, but I heard that its better to try and do as much as possible in one software package. That's all for now, thanks for reading!

Wednesday, October 8, 2014

Death's Mask - Polypaint


I wanted to make this mask with hollow eyes to make it like a real mask. I had to rework a lot of the detail using Dynamesh to cut out the holes for the eyes using this quick tutorial I found on youtube.

Once I was finished redoing the detail, I quickly polypainted the model. I will do the retopology for the model to bake it down and transfer the detail. Thanks for reading!

Saturday, October 4, 2014

Death's Mask Revisited


I have been thinking a while that I never finished one of the sculpts that I really liked a while ago of Death's Mask back in March. Now that I'm better at ZBrush I thought that I should revisit it and work more on the detail.

I think I will rework the eyes and make it look more like a real mask with eyes all the way through. That's all for now, thanks for reading!

Saturday, May 3, 2014

Orc Head - Update # 7


Here's a render of where I'm at. I have finished doing the polypainting the orc, but I still felt like it was too empty. I applied the red marks across his face to be "warpaint", but I don't think I like it as much and may go back.

All I have to do now is bake everything down, paint the eyes in Photoshop (I don't like to poly paint eyes in ZBrush) and render it in Marmoset Toolbag. I'm almost done, but I don't think it will be that easy. I usually run into one thin or another in the baking process. :(

That's all for now, thanks for reading!

Saturday, April 26, 2014

Orc Head - Update # 6


So those are the renders of what I've got so far on the painted head. I have to say that I'm liking this so much more than my previous attempt at painting. I will hopefully have more time this weekend to add more color to the model.

I do have to add that the hair won't be white. I just haven't gotten to it yet. Thanks for reading!

Sunday, April 20, 2014

Orc Head - Update # 5


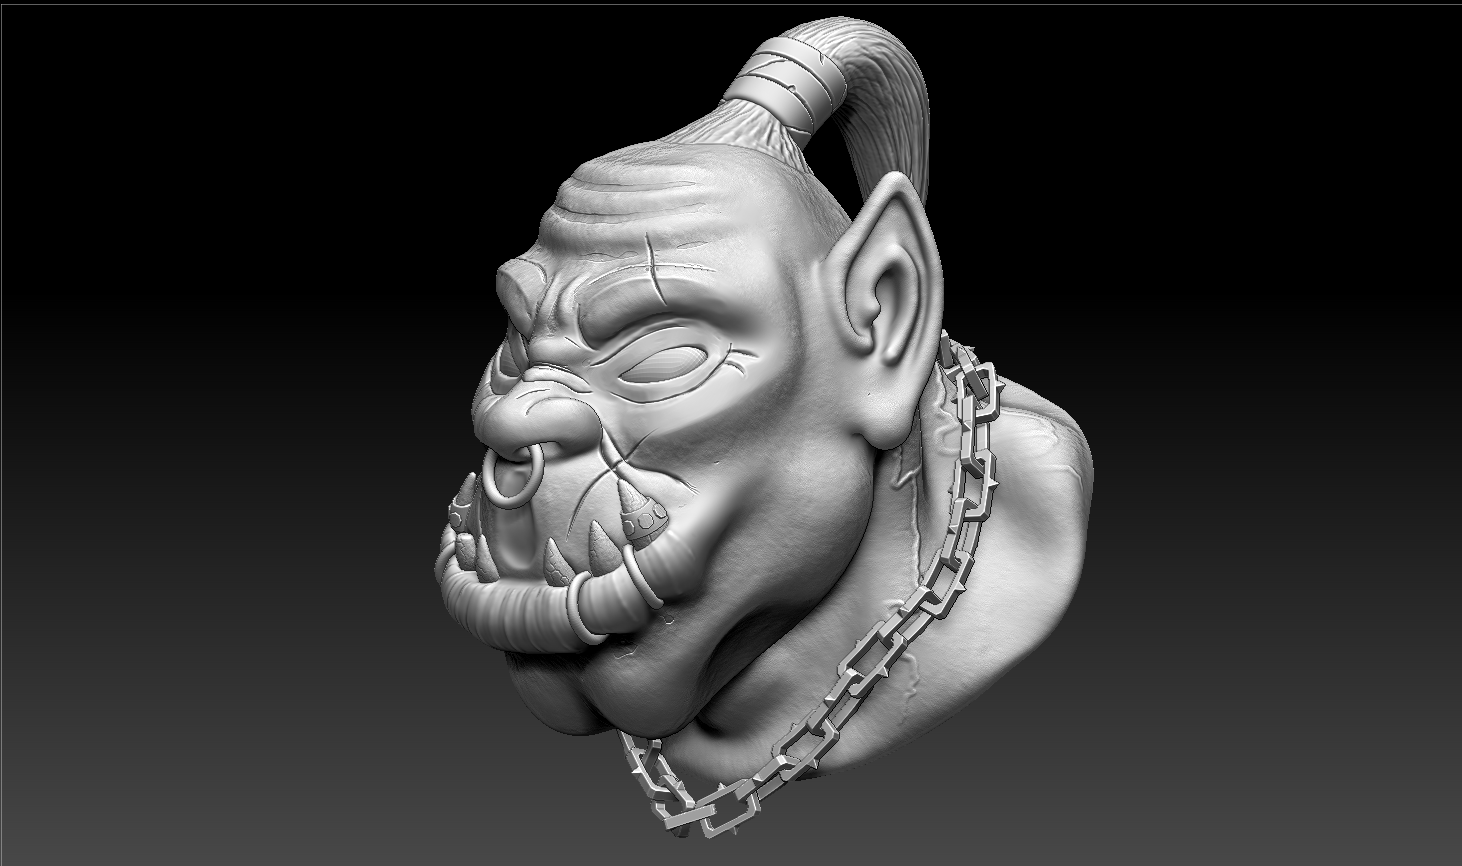
So I decided to backtrack on model for a bit. I decided/found out that I hadn't put enough detail to start painting. I tried to add the detail as I was painting, but that was a horrible idea. At least I figured it out before I spent a long time painting.

On this version, I put some texture/detail on the skin and the teeth. The hair still looks weird, so I'll see if i can find an alpha that can help me in that area.

That's all for now, thanks for reading!